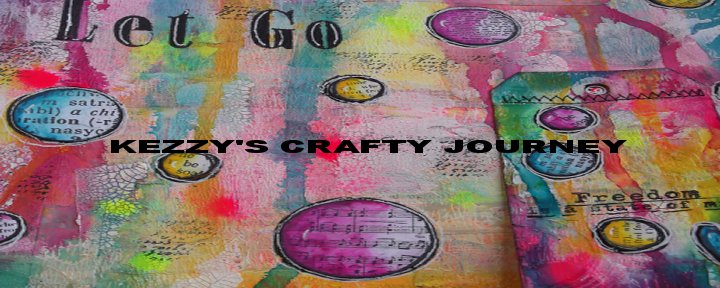
Winter Flowers

For this week I decided to do a vintage hanging and I have done a step by step again of how I got about it lol, be aware lots and lots of pics. Everything product I use I will highlight as I go along, all these products
can be found on the Creative Expressions website :-).
can be found on the Creative Expressions website :-).
Vintage Winter Flowers

Some close up pictures


And now for the step by step, you possibly need to grab a cuppa before you start lol.
First off we need to do the background as it takes around 12 hours
to be completely dry.

Completely wet the card with water on both sides

Now gently scrunch into a ball, if it feels like it doesn't want to fold
then you need to add more water

Lay out the scrunched ball, this will get messy so make sure
your working in a cleanable area lol

First off I sprayed Cosmic Shimmer Misting Ink - Dark Spice and
Cosmic Shimmer Mist - Rich Gold

Next I sprayed Cosmic Shimmer Mist - Bronze Blush

Next Cosmic Shimmer Vintage Mist - Antique Rose

Next I sprinkled in areas Cosmic Shimmer Mica Powders -
copper, red bronze, dark bronze

Then I sprayed some more Cosmic Shimmer Misking Inks - Dark Spice

Next I sprinkled Cosmic Shimmer Mica Pigments - sparkle antique plum
and Cosmic Shimmer Polished Silk Glitter - sahara gold.
This glitter is truly amazing, it's so soft, I shall do a closer tutorial soon to show
you how lovely the glitter is :-)

Spray each of the sprays a little bit more to catch the mica and glitter.
Make sure you use more of the dark spice if you are looking for a vintage look like
I was. Now leave to dry, I left mine overnight. Doesn't it look yummy :-)

For my main backing I chose good old corrugated cardboard, this came in
a parcel I received all rolled up to protect the items, thanks mr courier lol.

On the back I used some Foundations A4 brown card
to secure and tidy up the back. For the vintage effect I meant
to mention above I torn all the sides of the corrugated cardboard.

I wanted to add some crackle on the edges so I mixed
Distress Crackle Paint - rock candy, with Cosmic Shimmer Misting Ink - dark spice
and Cosmic Shimmer Vintage Mists - antique rose

Yummy :-) EEEK just to mention, it's not for eating!!!! lol

Just slap it on the corners and leave to dry, I left mine for around 6hrs whilst I was
doing the next stage :-)

Now in the end I didn't use this, but it's a fab idea that I sometimes do,
if I see something I would like on the heading sheet I just cut it out
and use it lol, as it was I needed a bigger heading so I have kept it for
future use :-)

Now I didn't use the flowers on the book paper but
I had the idea to use them to make a flower so I have some for
future use. I stamped with Archival Potting Soil wow I really love this,
at first I thought I have coffee why would I need another brown but
this is super gorgeous, no wonder everyone is using it :-)
I stamped the images on watercolour cardstock as I knew I was going to
be painting layers.

For the colouring I used Distress Inkpad - black soot,
Cosmic Shimmer Acrylic Drawing Ink - Dark Spice, Umber (from autumn shades),
and Summer Plu (from vintage).
As you can see I was testing what colours I wanted lol

First I used the black soot with a fine slightly wet paint brush,
and painted where the shadows would be.

Next I took dark spice and covered the whole area

Next I layers some umber on the light shaded areas

Back with dark spice

then I painted the summer plum over the flowers only.
This gave me a slight colour to go with my background

I also made a mask for each plant

I then covered the plant with the mask so I could add Distress Inkpad -
antique linen.

I forgot to photo the next two steps but I then added Distress Inkpad - gathered
twigs and walnut stain around the outside, and then
distressed the sides and added little rips in areas.
Then I stamped with Creative Expressions - Timeless Journey script
while the mask was still on.
I used Stampers Anonymous Tim Holtz Worn Text and then
gave the same treatment as the flower panels but stamped
with Creative Expressions - Textures (cracks) instead of the script.

A view of all the finished stamping pieces.

A closer look :-)

Now Cosmic Shimmer Acrylic Drawing Inks
are amazing, some have sparkle, some don't. They are great to mix both, like above
the initial image was with the non sparkle but the added
colour on the flower is sparkled how gorgeous is that.
Also look you can leave them on there sides and they don't drip and that
fine brush is truly awesome, really fine and precise.
So for the flowers that I didn't use, I decided that it would be nice
for them to have a bit of colour like the flower images, this
was so much fun, just tap and it gives great fine splats, brilliant.

Closer look at the background edges we did earlier :-)

I inked up the sides with gathered twigs and walnut stain.

Now that our other background is dry it was quite stiff and wouldn't
lay flat, so I gently ironed in between two pieces of ordinary copy paper.
Yep that iron is old, but it is only used for craft lol

How gorgeous does this look.

closer look

It really is amazing all the different colours and sparkle you get, stunning.

Now for my embellishments. To start with I took the
super gorgeous Creative Expressions Large Cameo and painted it with
Eco Green Paint - black. I covered the whole piece so
it all looked consistent.

I also had a look for some other embellishments, these are from
family and friends that are always giving me bits and bobs before
they throw them out :-)

I also used Creative Expressions Black Pearls - 5mm,
Creative Expressions Victorian Corners, Creative Expressions
Tassels and highlighted them all with Creative Expressions
Metallic Gilding Wax - cast bronze.

Last but not least lol, I wanted a bit more colour around the edges
of the corrugated cardboard so I used a mix of
Cosmic Shimmer Ultra Thick Embossing Crystals - lilac black
and Cosmic Shimmer Detail Embossing Powder - bright gold.

Right I better be off, I hope you enjoyed the tutorial and hopefully you will be inspired to have a go.
Happy Crafting :-)
Hugs
Kezzy xxxxx
7 comments:
Fantastic Kerry and the step by step photos are really useful. The background looks like a piece of fabric.
Fantastic step by steps Kerry. Your backdrop looks so so opulent , the colours are divine. Love your stamped flowers and beautiful colouring too. Love your use of corrugated card too adding wonderful texture. Fantastic piece. Tracy x
Thank you so much for taking the time to make this tutorial it is most inspiring and the finished project is amazing. Thanks again xxxx
Wow! this is just stunning! It is really sumptuous, like rich old velvet. Really inspirational and original! Julie Ann xx
absolutely amazing \kerry - love this and thanks so much for all the details - brilliant x
What a fantastic project, Kerry! Amazing textures from the card and the flowers look stunning!
Alison xx
Wow, absolutely stunning!!
Post a Comment